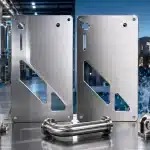


A kiosk enclosure may look like a simple sheet metal cabinet, but it has to coordinate the user interface, electronics, thermal management, cable routing, security, installation and field service. If these requirements are resolved only after the outer shape has been approved, the project often returns to CAD with a larger screen cutout, extra vents, a new service door or a completely different internal layout.
The most efficient approach is to design the enclosure around the complete system. Nova Fabrication’s custom KIOSK cabinet capabilities can support purpose-built housings, but a clear technical package is still essential. The checklist below helps product teams close the main decisions before drawings are released for cutting and bending.
Key takeaway
Freeze the real screen, computer, payment or scanning peripherals, power equipment and service strategy before freezing the cabinet. An enclosure can only be as reliable as the component data and operating conditions used to design it.
Start With the Complete System, Not the Empty Cabinet
Kiosk design should begin with a component schedule and an operating scenario, not an attractive shell. List every item that must be installed, its dimensions, weight, power consumption, connectors, mounting pattern, operating limits and replacement method. Then define who uses the kiosk, where it will be installed, how long it must run each day and who will maintain it.
Design area | Questions to close before fabrication |
Deployment | Indoor/outdoor, traffic, uptime, cleaning, vandal risk |
Screen | Exact model, orientation, active area, mounting, glare, replacement path |
Thermal | Heat load, ambient range, solar gain, airflow, filters, cooling |
Cabling | Power/data separation, glands, strain relief, service loops, grounding |
Enclosure | Material, anchoring, locks, seals, drainage, finish |
Maintenance | Door swing, tool access, modular trays, filters, largest replaceable part |
Define Deployment and User Requirements
Record whether the kiosk is indoor, semi-outdoor or fully outdoor; fixed to a floor, wall or counter; and exposed to direct sun, rain, dust, cleaning chemicals, salt air or heavy public traffic. Indoor retail use and an unsheltered transport kiosk do not need the same material, sealing, ventilation or anchoring strategy. Target uptime, expected service life, acoustic limits and acceptable maintenance intervals also affect the design.
Map the user journey before setting screen height and peripheral positions. Touch zones, card readers, scanners, printers, cameras and accessibility requirements must work together without forcing awkward reaches or blocking one another. Early engineering services can translate these functional needs into an enclosure concept that is realistic to manufacture.

Screen and Front-Panel Integration
Select the exact display model before detailing the front panel. Screen diagonal alone is not enough: the enclosure needs the full outline, active image area, mounting points, connector positions, ventilation keep-outs, weight and the manufacturer’s allowed orientation. The opening must account for bezel coverage, touch accuracy, panel tolerance, protective glass or gasket thickness and the path used to remove the display.
Confirm portrait or landscape orientation, viewing angle, brightness, glare and sunlight exposure. Outdoor units may need a high-brightness display, optical bonding, anti-reflective treatment or solar shielding, but these decisions must come from the selected display and environment. Do not let the decorative fascia carry loads that belong on a dedicated internal bracket or frame.
A precise front opening and repeatable mounting features can be produced with sheet metal laser cutting, while returns and stiffening flanges are formed through press brake bending. Keep fasteners, welds and bend lines away from the screen’s sensitive zones, and preserve enough tool access for final assembly.
Ventilation and Thermal Management
Build a heat-load list using the worst credible operating condition. Include the display and backlight, industrial PC, power supply, printer, payment hardware, network equipment, lighting and any battery or UPS. Compare this load with maximum site temperature, solar gain and the operating limits of the most temperature-sensitive component. An enclosure that runs acceptably in an air-conditioned workshop may overheat in a sunny lobby or outdoor installation.
Low heat loads may be managed by natural convection. Higher loads can require filtered fans, ducted airflow, heat exchangers or active cooling. Position intake and exhaust openings so air passes across the major heat sources instead of short-circuiting between two nearby vents. Filters and fans should be replaceable from the service side, with enough free area that dust loading does not immediately restrict flow.
Ingress protection and cooling must be designed together. An open vent can reduce protection against dust, rain, washdown or insects; a tightly sealed box can trap heat and condensation. Do not claim an IP or NEMA rating from a gasket alone. The complete enclosure, including doors, vents, cable entries and hardware, must be developed and validated for the intended environment. Similar issues are addressed in purpose-built electrical device cabinets.
Power, Data and Cable Routing
Create a cable architecture before locating brackets and doors. Identify mains power, low-voltage DC, data, antenna, audio and peripheral connections; then provide suitable separation, shielding and bonding in accordance with the applicable electrical requirements. Route cables away from sharp edges, hot components, moving hinges and fan blades. Use edge protection, glands, grommets and strain relief where a cable enters or crosses sheet metal.
Allow manufacturer-specified bend radii, service loops and connector removal space. A technician should be able to open the kiosk without pulling a cable tight or disconnecting unrelated equipment. Pluggable harnesses, labeled ends and dedicated cable channels reduce assembly errors and field-service time. Grounding points, protective earth continuity and power-distribution mounting can be coordinated using lessons from control panel cabinet manufacturing.

Structure, Security and Surface Finish
Check center of gravity, base size, anchoring points and the loads created when a user pushes, pulls or leans on the kiosk. Doors and access panels need rigid edges, suitable hinges, controlled gaps and locks appropriate to the public environment. Conceal or protect fasteners that should not be accessible from the user side, while avoiding a design that becomes impossible for authorized technicians to open.
Material and finish should match indoor or outdoor exposure, cleaning chemicals, corrosion risk, appearance and budget. Drain paths, drip edges and compatible seals matter as much as the nominal sheet grade. Sound professional welding services help control strength and seam quality, while appropriate coating services can provide the required color, durability and surface protection. Mask threaded inserts, electrical bonding points and critical fit surfaces before coating.
Maintenance Access and Component Replacement
Design the service route for the largest and most frequently replaced components: display, PC, power supply, printer, fans and filters. Confirm door swing, technician position, tool clearance and the path each part follows out of the enclosure. A display that fits inside the cabinet but cannot pass through the service opening is not serviceable.
Use removable panels, slide-out trays or modular mounting plates when they shorten maintenance without reducing stiffness or security. Captive fasteners help prevent lost hardware. Separate user-facing panels from service modules so cosmetic parts do not have to be removed for routine work. Filters should be reachable without exposing live electrical areas, and doors should remain safely supported while open.
A well-planned enclosure also supports upgrades. Standardized mounting zones and replaceable subassemblies allow a new computer or reader to be installed without rebuilding the complete shell. This serviceability mindset is central to efficient cabinet manufacturing.
Prototype, Test and Release the Design
Before volume production, review the 3D model, controlled drawing and bill of materials together. Use exact supplier models for the screen and peripherals, identify critical dimensions and allow the fabricator to optimize non-critical details. A prototype or first article should confirm assembly sequence, cable installation, screen alignment, door operation, anchoring and the replacement of every service item.
Thermal testing should represent realistic equipment load and ambient conditions. Where environmental protection is required, validate doors, gaskets, vents and cable entries using the specified test method. Record measurable acceptance criteria for temperature, noise, finish, gaps, access time and functional operation before releasing production.
Final Pre-Fabrication Checklist
- System definition: Exact screen, PC, power supply and peripherals are approved.
- User interface: Screen height, viewing angle, touch area and peripheral reach are confirmed.
- Display integration: Mounting pattern, active area, connector access and removal path are verified.
- Thermal inputs: Heat loads, ambient range, solar exposure and duty cycle are documented.
- Cooling: Airflow, fans, filters or closed-loop cooling are sized and serviceable.
- Ingress: Doors, vents, seals and cable entries support the required protection strategy.
- Cabling: Power and data routes include separation, bend radius, strain relief and service loops.
- Structure: Anchoring, center of gravity, door stiffness and vandal resistance are reviewed.
- Finish: Material, coating, masking, corrosion exposure and cleaning method are specified.
- Maintenance: The largest component can be replaced through the intended access opening.
- Documentation: BOM, drawings, wiring information and service labels are controlled.
- Validation: Prototype tests and production acceptance criteria are agreed.
Conclusion
A successful kiosk enclosure is not simply a shaped metal shell. It is an integrated product that keeps the screen readable, electronics within temperature limits, cables protected and service tasks straightforward. Share the component list, installation environment, target finish, drawings and expected production volume when you request a quote so the enclosure can be reviewed as a complete manufacturing system.